Living with stage 4 cancer means I have learned to do what I love whatever way I can for as long as I can. I have been fortunate to remain relatively healthy and without debilitating symptoms, at least for now. So, this means I have energy to do things that put me in my happy place.
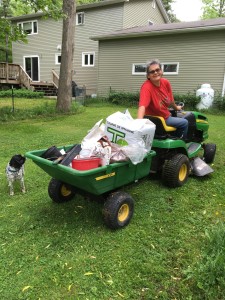
One such activity is driving my tractor to haul bags of mulch, to cut down tall grasses, mow the lawn, and move firewood for stacking. No matter what I’m doing on my John Deere, it makes me happy!
A few years back, I discovered straw bale gardening. It met the criteria for ample tractor use plus a few added bonuses. I have wanted to share this process and so here you go…
Straw Bale Gardening
Why use straw bales?
For me, the sunny spot for full sun is in the back of our property where the water table is high. It tends to be a bit soggy for many plants. Using straw bales allows gardening virtually anyplace you want, regardless of the soil, how much space you have, or what kind of conditions you have. The straw bales become your containers. Some people put bales on their porch, along their patio or driveway, basically any place that can take advantage of good sun.
Another advantage of straw bales is that they allow me to garden without a lot of kneeling and bending. This is less strain on my body and allows me to tend to my plants easily. I can talk to my tomatoes and encourage my tomatillos and without getting on my knees. The bales create a raised bed that makes it easy to harvest too.
One of my favorite things is that straw bales serve as a container for my plants while providing them a rich, nutritious base. They are rather self sustainable. When treated properly, the bales begin to decompose over the course of the growing season. This is like growing veges right in a compost pile. The plants, send their roots down through the straw and get all kinds of good nourishment. And at the end of the season, the composted straw can be used in your gardens or potted plants.
What you need to get started?
Here are the basics for getting started using straw bales for your garden.
Gather your materials:
- buy your straw bales – Here in upstate NY, I get mine in May so I can start treating the bales at least two weeks before planting. I will explain what to do below.
- get a bag of soil and compost – we will use this just as you would when planting in conventional containers.
- get a high nitrogen fertilizer — we will use this to treat your bales. Please know there are other ways to do this and I am showing you how I do it. I use liquid fish fertilizer.
Where to put your bales:
- plan out where you are going to put your bales. you can have just one or a whole bunch depending on how many plants you want to grow
- don’t cut the string or whatever material is binding the bale together. Yo
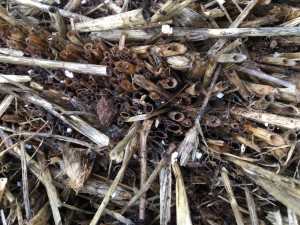 u want it to keep the bale intact.
 - make sure the bale is placed so the binding is on the side – you should be able to look straight down and see the cut straw as in the picture to the right.
- you will want your bales to be in a sunny location
- you will want access to water, or be able to haul water to your bales
- you will want to place your bale where you can eventually gather it up as compost or spread it around
- be sure to pick a spot and plan to leave it, unless you put it in a wagon or other rolling base. once you start to water the bales, they can get heavy
How to treat your bales:
- do not plant anything in your bales before you treat them properly. This requires watering, fertilizing, and cooling before plants go in. It’s easy…really!
- plan to water your bales daily for 12- 14 days
- on day 4 through day 10, mix your high nitrogen fertilizer with water and pour over the bales, then water as normal to allow the fertilizer to soak in
- after day 10, just keep watering. your bales will begin to heat up inside from the decomposing process. this is good but you need then to start cooling off before planting. typically, they are ready around day 14 or so. I make a hole with my trowel and stick my hand down into the bale to feel the heat. it’s kind of exciting!
How to plant your veges, herbs, flowers or seeds:
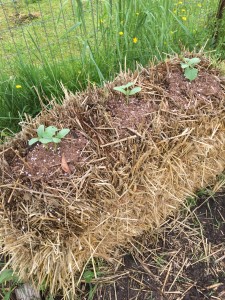 Remember, planting in your straw bales are just like planting in a container
- plant anything you want to grow in your bale, keeping in mind to space your plants as you would in the ground.
- I planted these three cucumbers in one bale and will allow them to drape over the edge as they grow
- dig a hole into the bale. I use a trowel that allows me to hack into the straw
- once the hole is dug, fill it with dirt and compost just as you would do in a container
- then, plant your starters and water as normal.
- you will want to make sure your bales do not dry out, so water regularly
- plan to add fertilizer every week or two to keep the bales decomposing
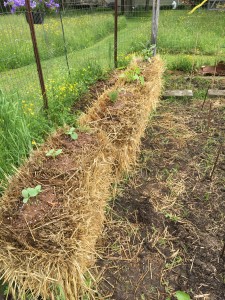
This yellow squash started budding right away in my bale garden.
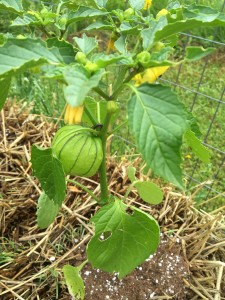
So did my tomatillos!
At harvest time
- harvesting is the same as for other gardens.
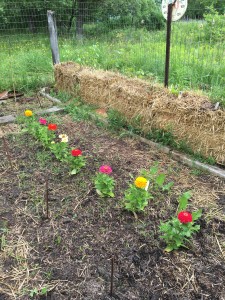
- in my garden, I allow the bales to keep on decomposing over the winter. come spring, I use it as a great compost for other plants.
- the picture shows flowers planted into soil that is rich with last year’s decomposed bales. they look happy!
There are several websites that can give you other tips or methods. Just search “straw bale gardening. ” I hope you have abundant growth, budding success, and find your happy place in the process.
Let me know how it goes!
Bridgett



Thanks, Bridgett,
Great to see you–this was really fun to read–I loved seeing the pix
Thanks, Bridgett! This could be the answer to me not wanting to rebuild my raised beds! You look so cool on your John Deere! Happy Happy!
Yes, that’s the perfect thing about straw bales. They can go anywhere you need them to be. Can’t wait to see what you end up doing.
Here’s to YOUR happy place!
Bridgett